IKEA hack: BESTÅ unit with HANVIKEN doors with speaker fabric
There’s a room in the house called the Marty Cave. It’s like a Man Cave, but for Marty. And that’s me (phew) so that’s all good. And in the Marty Cave is my PS4 sitting on a shelf in my BESTÅ unit. One side is a solid glass door, with things like a networking switch and controller dock, and on the other side is a drawer for game storage, and a shelf for the PS4.
In November, that PS4 will become a PS5, and in total first world problems, it doesn’t actually fit on the shelf with the drawer in place. What to do, what to do. I have a spare glass door I could use, but then I don’t really want to be running electronics with a closed solid door (consoles can get hot and need some ventilation), and with a door open, the monster kitten known as Zack likes to explore. I needed something breathable, yet neat and fitting. I browse the IKEA website to see if there are suitable alternate doors available with fabric fronts, and that’s a no. But a Google shows how others have hacked IKEA doors for this very purpose.
This particular hack is an extension of this version by Chris on IKEA Hackers. Here, Chris uses the SINDVIK doors – a timber frame with a glass inner. In the comments, others had recommended HANVIKEN doors instead, which look the same but have a timber inner. Looking at the IKEA website, both doors are available in the 60 x 38cm size, but HANVIKEN run $10 AUD cheaper per door. My approach to the hack also uses a different method for holding the fabric in place.
I absolutely love the finished result, and am so impressed at the overall look. And unless you go and have a close look, you’d never know it is actually a fabric front.
What you’ll need
You’ll obviously need a BESTÅ frame of your choice – mine is the 120x40x38 in white.
And you’ll need doors for the unit, such as 2 x HANVIKEN doors, 60x38. Don’t forget you’ll also need a hinge set per door if they’re new – I upgraded my unit with the soft close versions.
You’ll also need:
Speaker fabric, allow 53cm x 32cm per 60x38 door
5mm screen door spline, approximately 1.7m per door
Scissors
Hammer and towel
Wood glue, such Aquadhere
Screwdrivers, or other long handled pokey devices
A second set of hands can really help for one of the edges
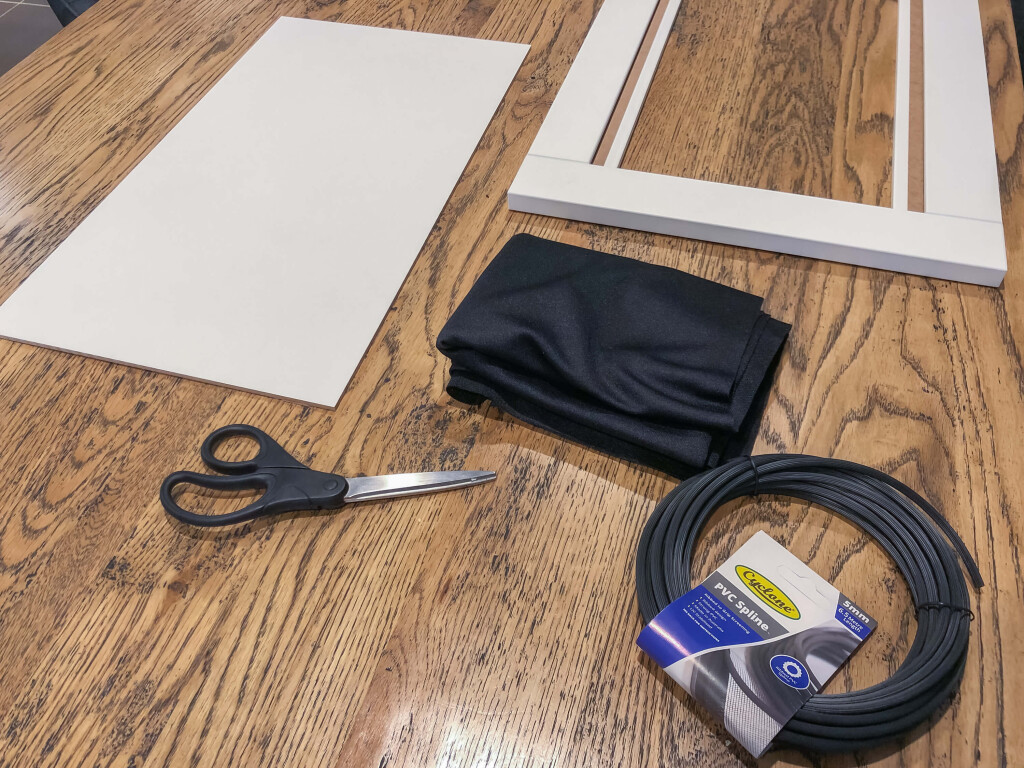
When picking your speaker fabric, make sure it has some elasticity to it. With the HANVIKEN doors, this is an absolute requirement.
Instructions
Let’s assume you’ve built your BESTÅ unit following IKEA’s instructions and are ready to go with the doors.
1. Remove the centre panel
Place the doors face-side down (to protect the front-facing edge).
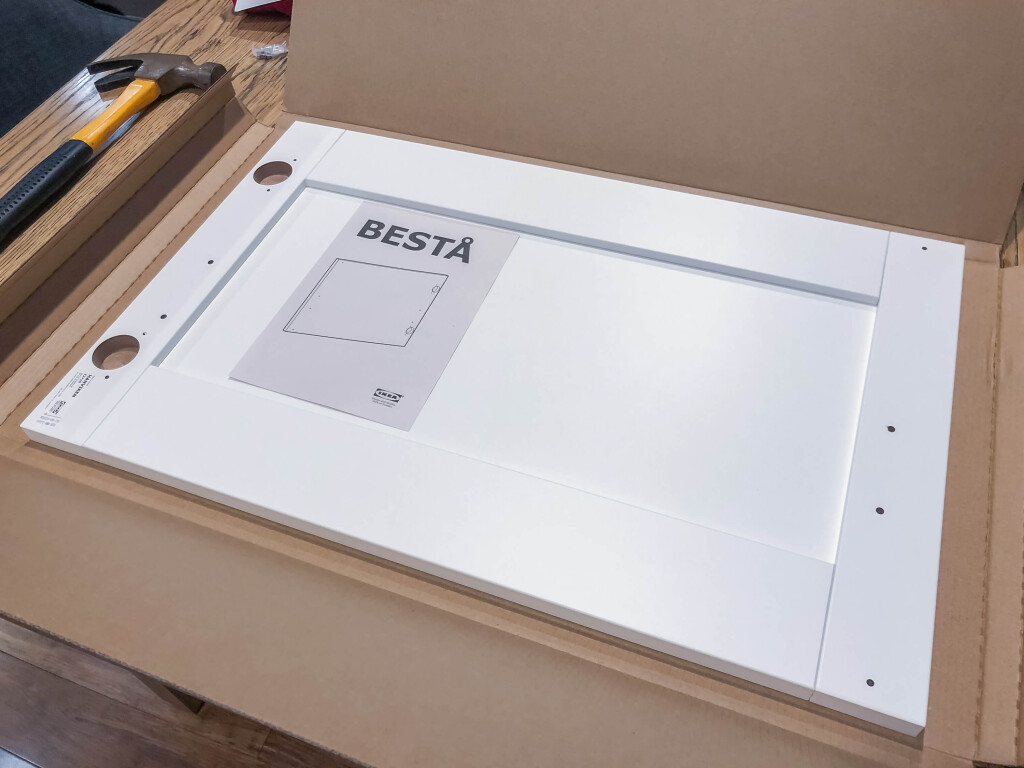
Place the towel against the inside of one of the short edges – this is to protect the frame from the hammer. Using a hammer, gently tap to separate the frame.
It is just held together with some glue and 4 wooden dowels. Make sure your taps are even and straight so the edge comes off both sides evenly as to not damage the frame or dowel.
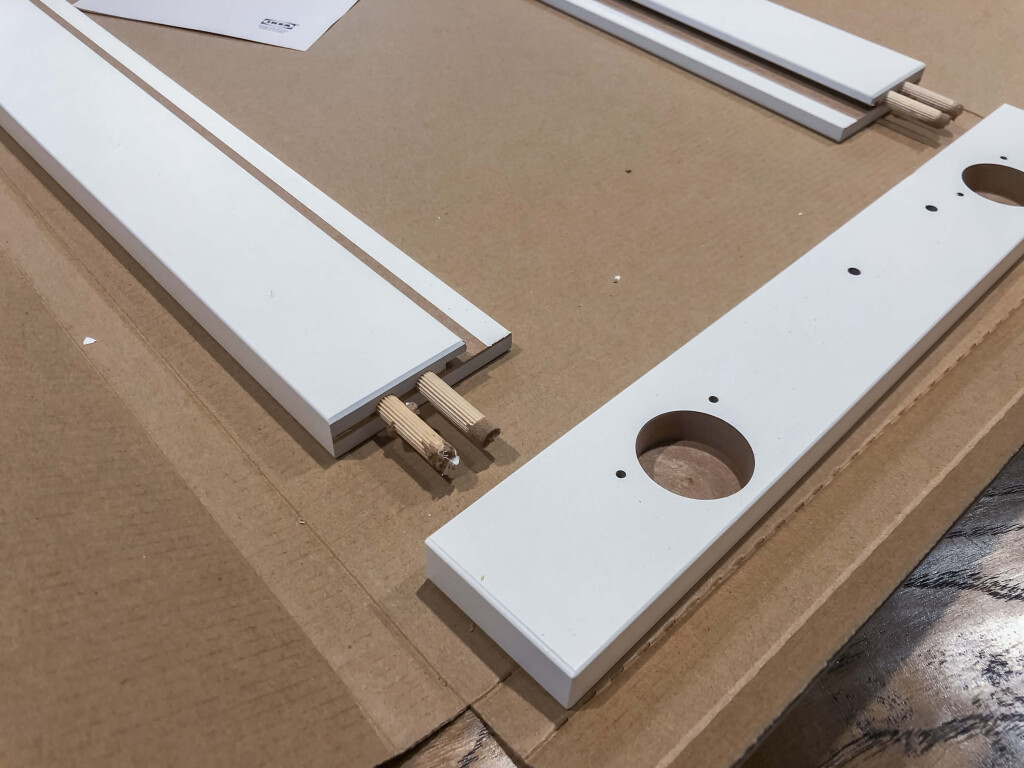
Slide out the inner timber, and set aside for measurements later.
The inner timber may be glued in on the short edge – one of my doors just slid out, but the other needed a bit of a tap with the hammer to break the glue. Even if there is glue, it’s not a lot and it’s not super strong, so should be fairly easy to remove.
2. Re-assemble the frame
Using a small amount of wood glue on the dowels, re-assemble the frame edge, and leave to dry.
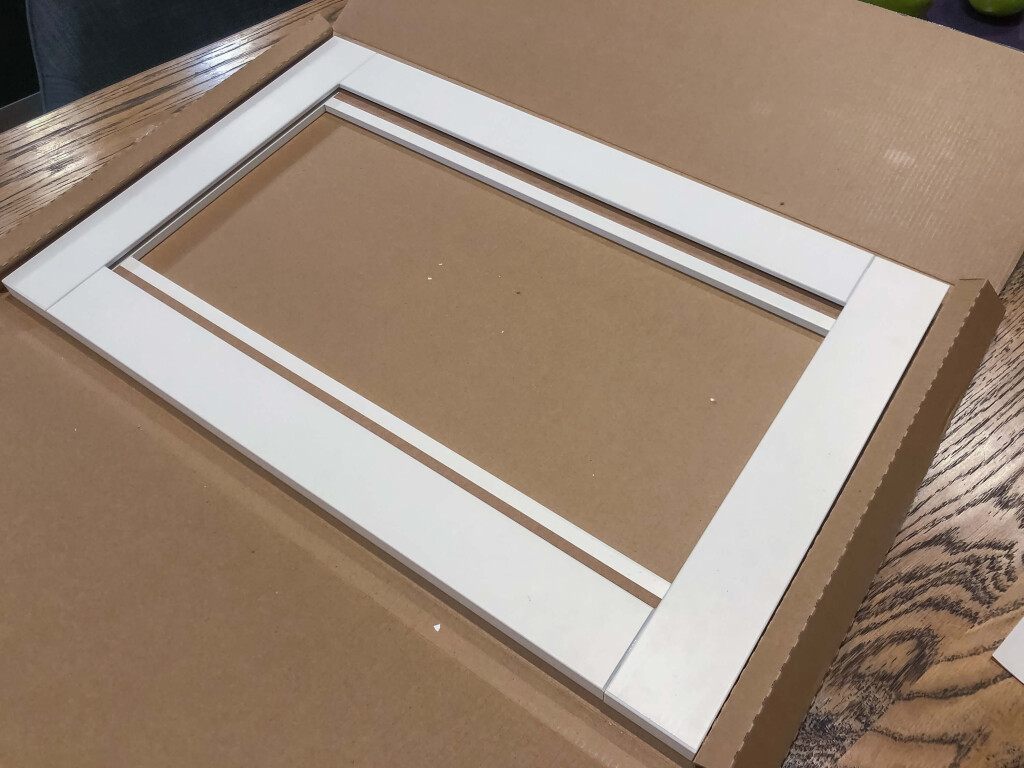
If you’re using glue like Aquadhere, if glue seeps out, a damp paper towel can be used to clean up any leaks. For other glues, check with the manufacturer instructions for how to clean up.
3. Cut the fabric to size
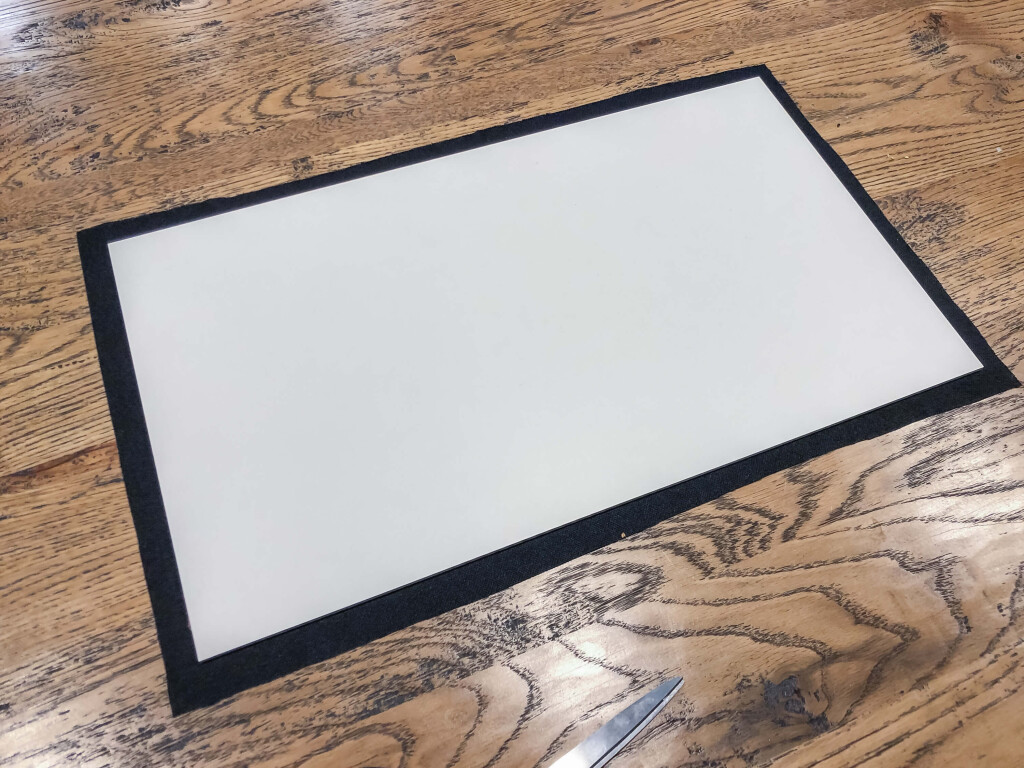
Place the fabric on a flat surface, and place the inner timber on top. Leave an edge of around 1cm to 1.5cm, and cut the fabric.
4. Cut the spline to size
Before picking your spline, best to check your door gap size. With the HANVIKEN doors, the gap is just shy of 5mm, and the 5mm spline is a squeeze but fits very snuggly. And if you need to pull it back out, it comes out easily too (but not so easily that it will fall out).
Unroll the spline, and cut to size of each inner length of the frame.
The fabric can bunch up in the corners, and I found it easier if the spline was slightly shorter than the actual length – maybe half a centimetre. Nothing major, but just makes the corners easier to work with.
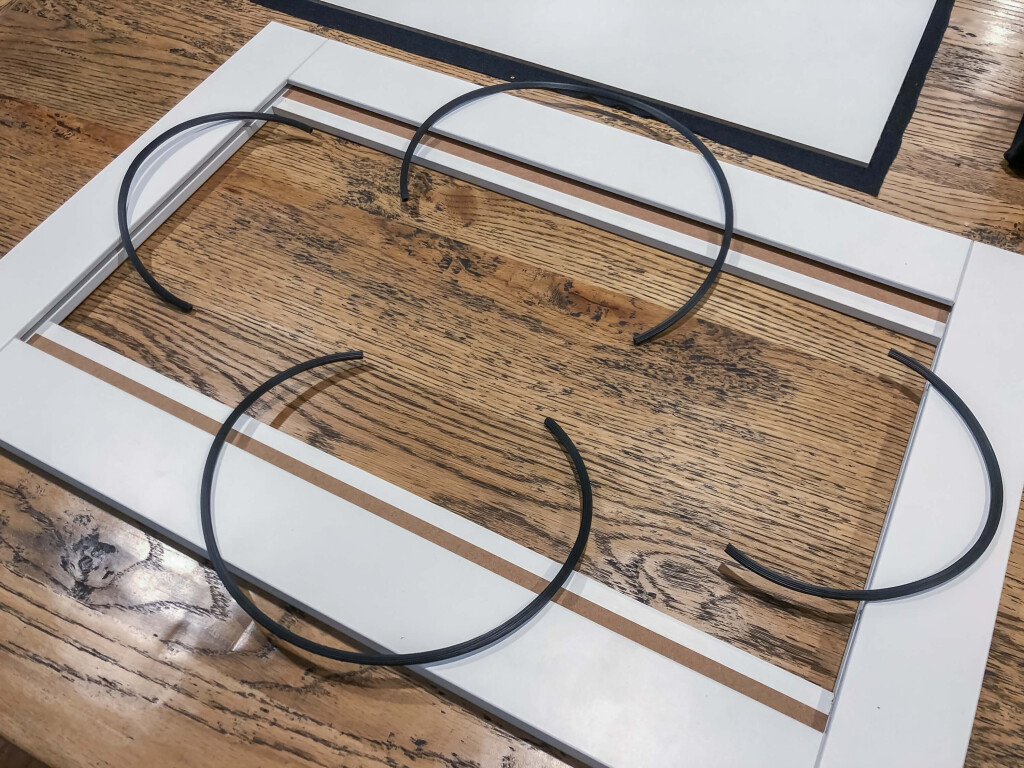
The spline may be rather stiff to work with. You may want to play with it a bit – roll it in the opposite direction for example – to help with straightening it.
5. Install the fabric in one of the long edges
This is where it gets fun. The HANVIKEN doors, along the long edge, have a timber lip that is on the back of the frame. This means that you’re working with a really awkward space.
When approaching the fabric install, I did the two long edges first, with the timber lip, and then the two short edges last. The short edges are a piece of cake compared to the long edges. That timber lip is really annoying. If I had a jigsaw I would have probably trimmed it down – but also see the “what would I do differently” section for another door consideration.
To install the fabric with the lip you will need to:
Place the frame with the front side up – so the lip is on the bottom
Figure out which side of your fabric is going to be the front facing side
Place the fabric then back side up (so front side down) as it will help with visibility
Place the spline against the long edge of the fabric, and fold the fabric over the spline. Start in one corner, and squeeze the spline in
Use a flat head screwdriver to help push the spline in
Bit by bit, keep easing the single edge in, using the tool to ensure the spline is completely in the groove
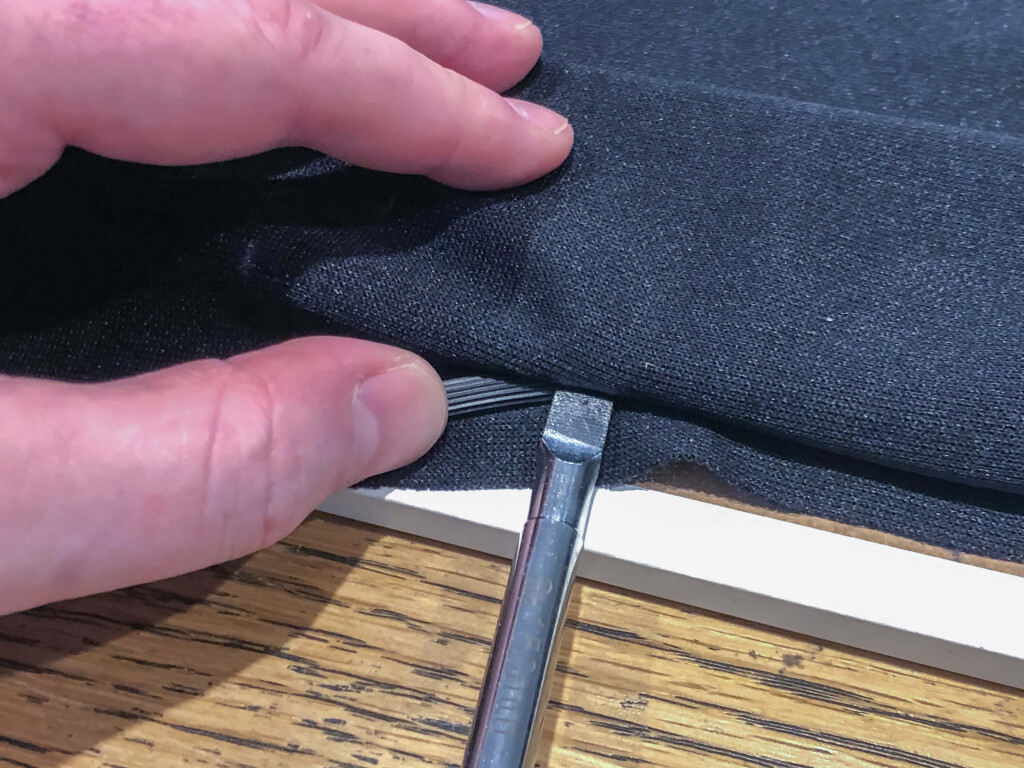
By now you’ll have the door with a flap of fabric coming out of the front, with the back side of the fabric facing up.
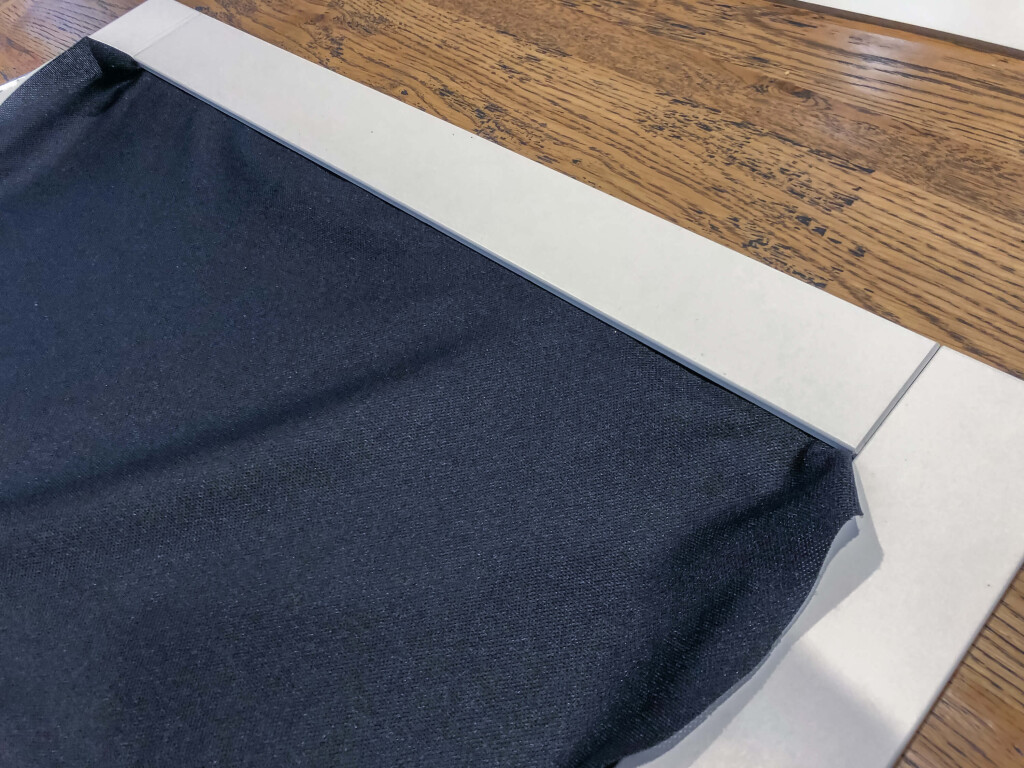
6. Install the fabric on the other long edge
This was the tricky bit. Because of the timber lip on the long edge, you can’t keep the door flat – you’ll need to have it more upright as you need access to both the front and back to work around the timber lip.
It is awkward to find the balance of:
holding the door,
keeping the fabric tight, and
installing the spline
For the first door, I had an extra set of hands help hold the door up. But for the second, I somehow managed it myself, holding the door up on my lap. If you have the 60cm high doors, that may be harder, but the 38cm high doors can be done solo.
You need to make sure that you’re making the fabric taught enough that is isn’t saggy, and not too tight that you don’t have room to move.
I used two different tools to get the spline in – the elasticity of the fabric is key here as you’ll need the fabric to stretch a little so you can get your hands and tools in to place. On the back end, I used a large flat head screwdriver, and on the front, a blunter screwdriver head from my kit – no idea what it is called, but it was flat, round, and had no sharp edges. Basically something that can press from the front without damaging the frame or fabric.
The reason here is that on the back, you can press the flat head screwdriver on the actual spline. But on the front, when you’re easing the spline in, you’re actually pressing on the fabric – so something gentler for the fabric is needed.
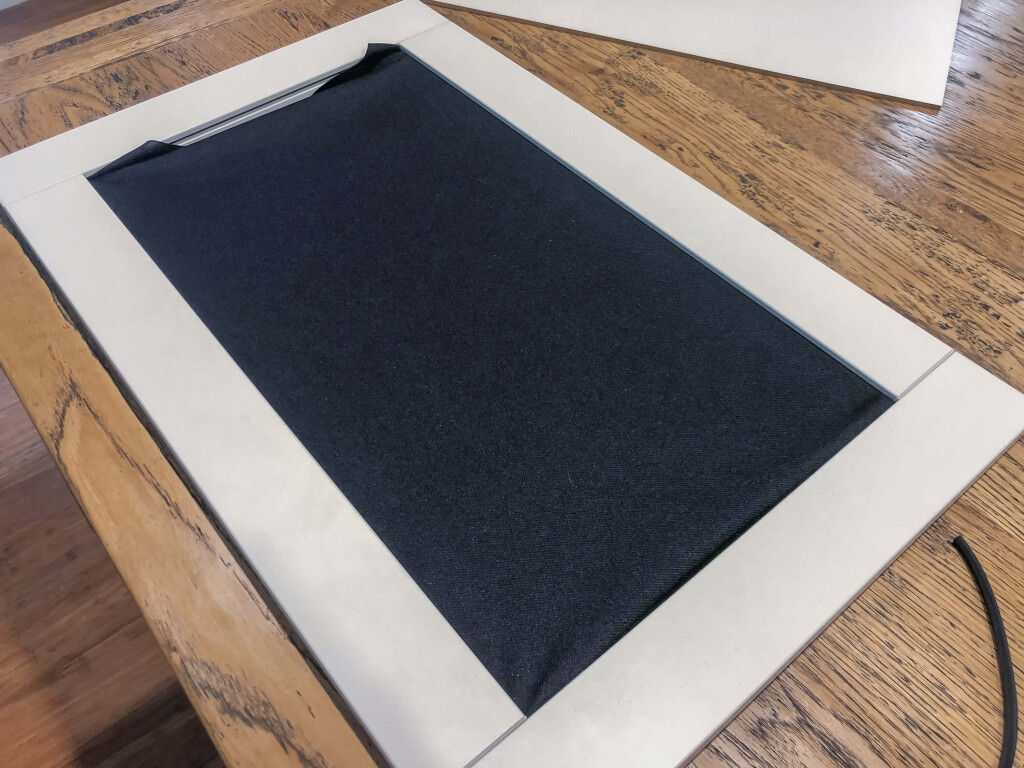
7. Finish with the two short edges
The timber lip edges are the hard ones – the final two short edges are super easy to install. Take care, and bit by bit, work down each edge.
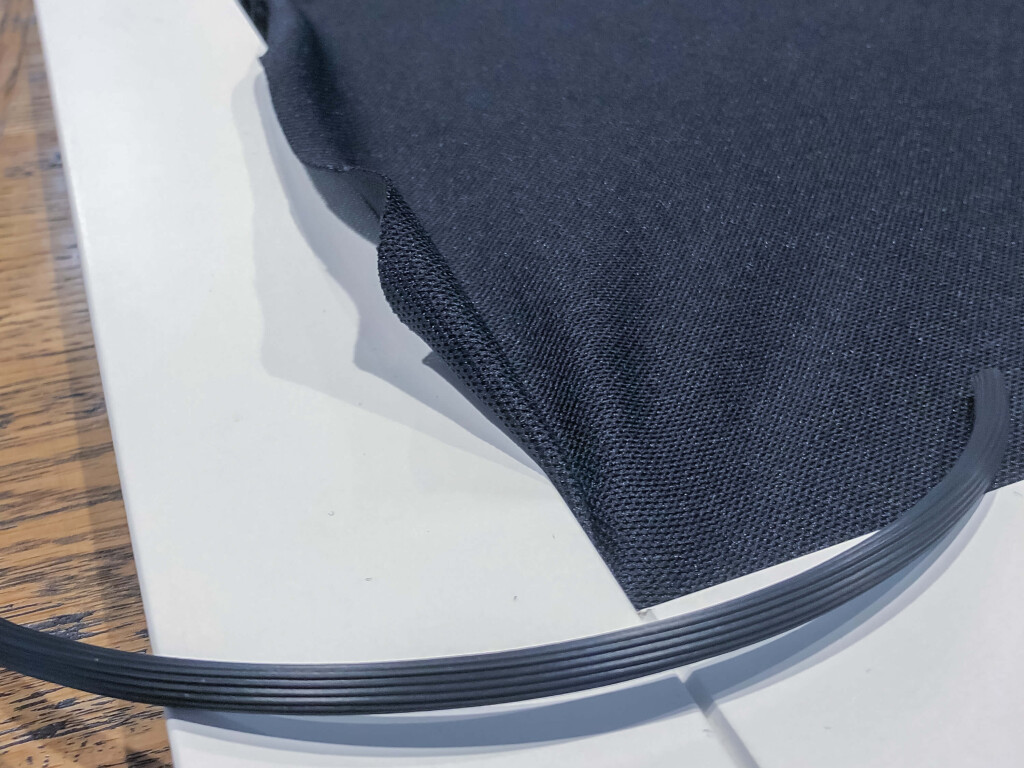
8. Run on the front
Run your finger against the front of the door against the fabric and feel if you have any spline that isn’t quite in. Using the blunt smooth tool, ease the spline in from the front.
You may also need to do this for the corners as they can be very hard to reach because of the timber lip.
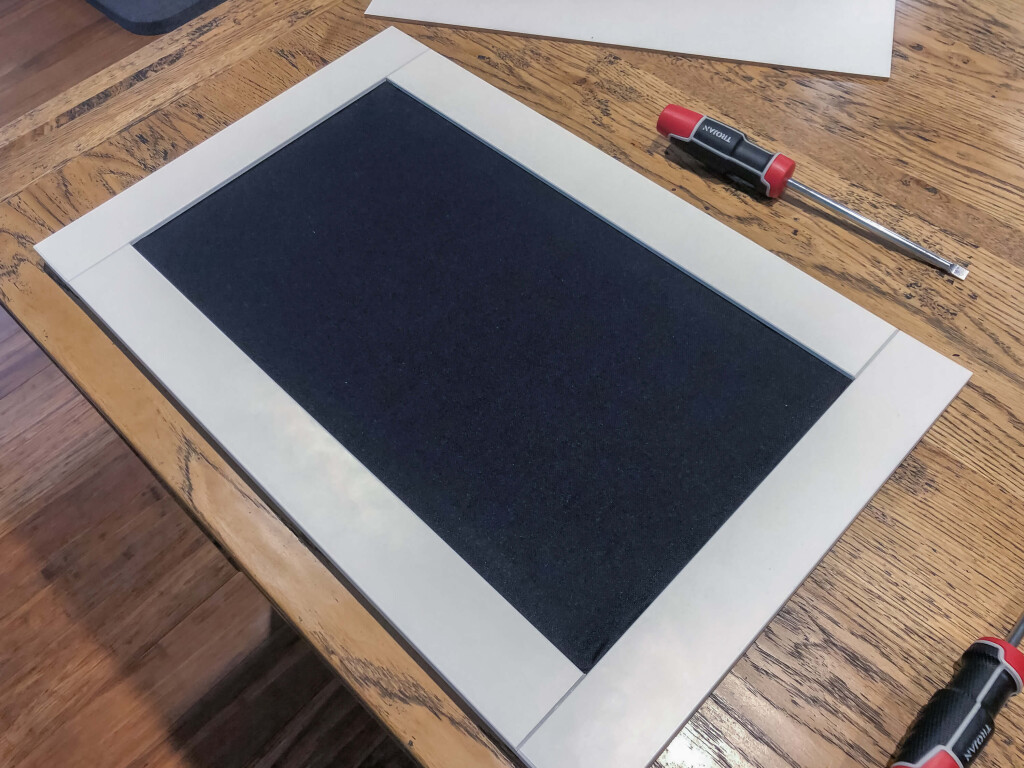
9. Install as per IKEA instructions
Using the IKEA fixings, install your doors as per the instructions.
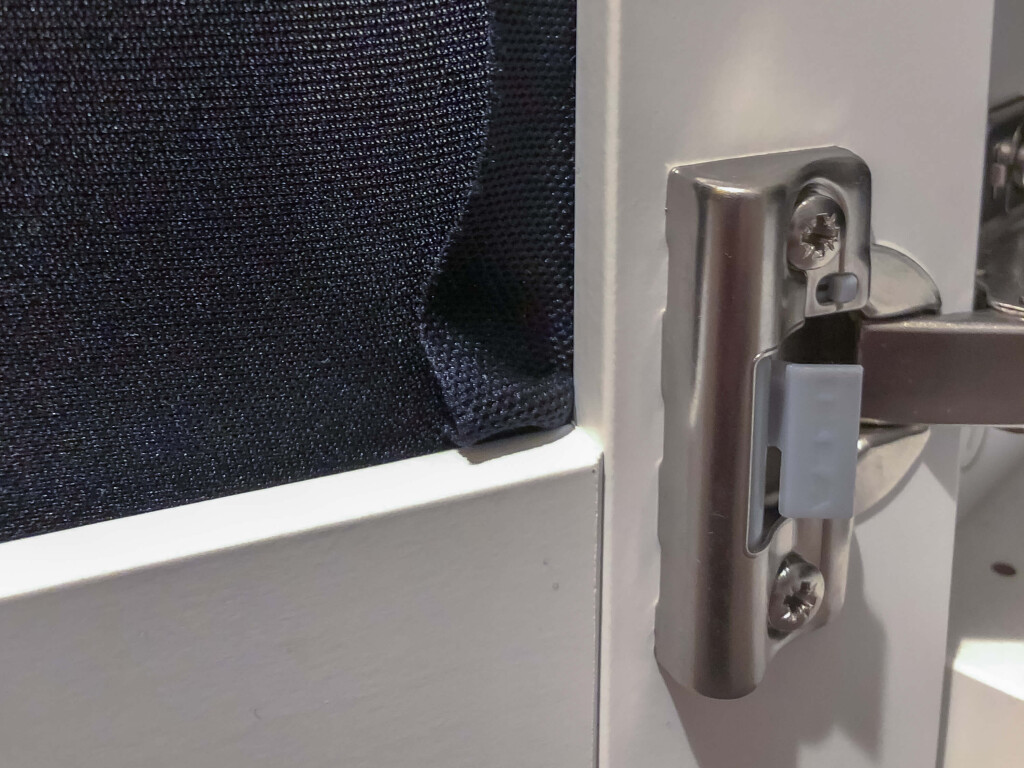
Before and After
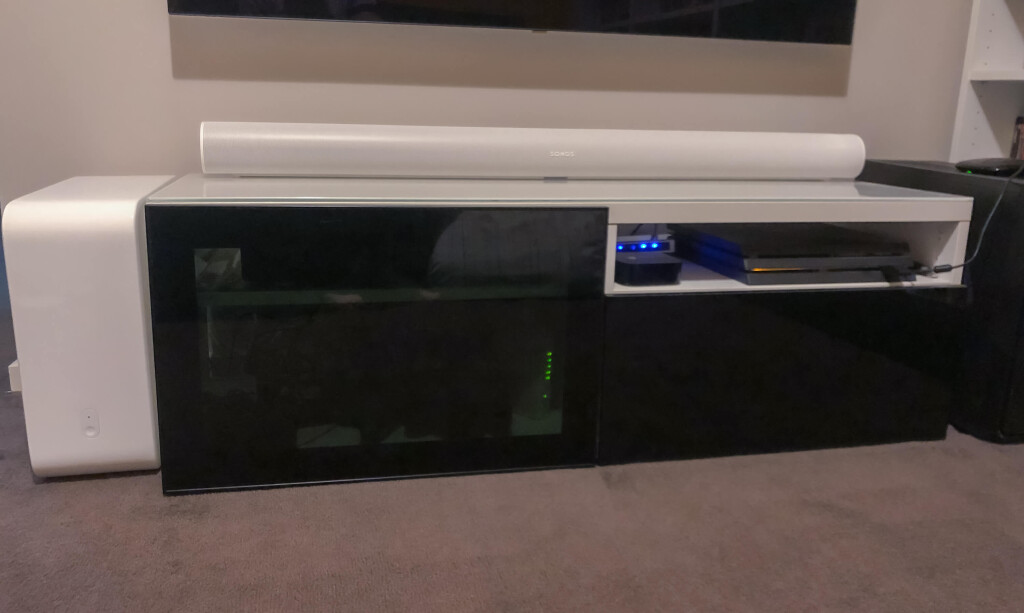
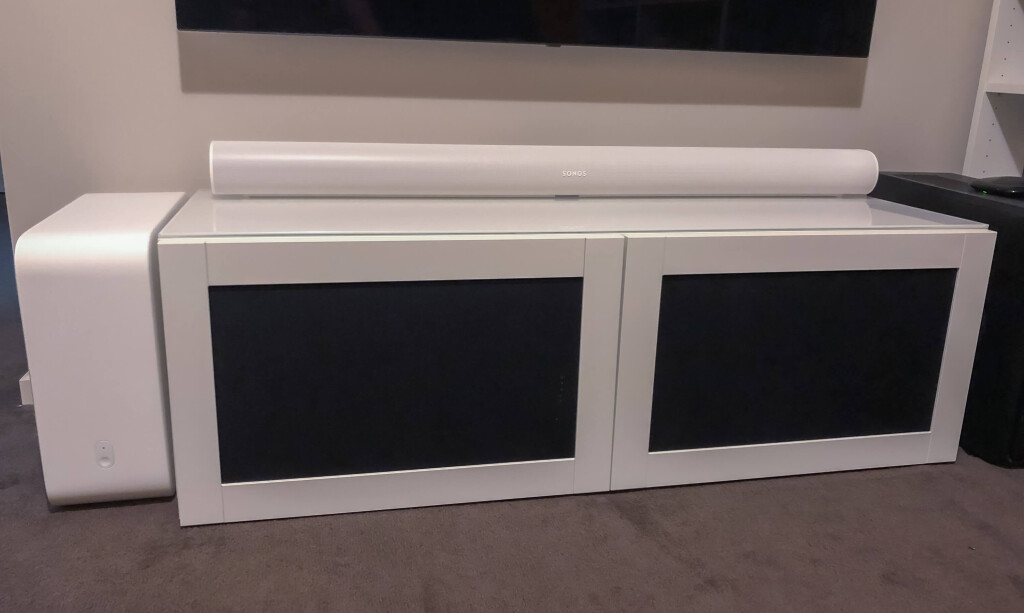
How much did it cost?
BESTÅ and door costs aside, assuming you have the tools and glue handy, the only new items needed are speaker fabric and spline.
The speaker fabric can vary in price based on quality – mine wasn’t the cheapest, but was from a reputable audio store who had a range of colours. I also ended buying far too much (just in case) and was $45 AUD for 170cm x 100cm. I've still got enough fabric for another two doors.
The spline is easy – just the stuff you put in a screen door. I used Cyclone Tufflite 5mm x 6.5m PVC Prepacked Insect Screen Spline from Bunnings, for $6.98 AUD.
Pay special attention to…
When cutting fabric, use the inner board as a sizing guide – allow 1cm to 1.5cm of extra fabric around the outside.
If you’re doing multiple doors, note that the fabric may have two subtly distinct sides - mine does. Make sure you match the same texture for the “front” side of each door.
You want to make sure that the fabric is taught – but not too tight that it pulls itself out – and free from bunching up along the edge. To avoid this, I found it easiest to edge in the spline bit by bit (rather than large steps along the entire length first). It’s more fiddly, but also produced a much cleaner finish.
Next time, what would I do differently?
I was disappointed when looking at the HANVIKEN doors that the inner frame on the long edge has a length of timber. With a solid door (as purchased), you’d never notice it, but when you remove that centre panel, there’s an extra bit of timber. Given the fabric is dark, you don’t notice it but it creates two considerations:
Getting the spline in the gap on those long edges with the fabric on the right side is damn hard and fiddly, and
This little bit of timber reduces the open area of the door
Sure, the difference in that open area is so small – but also on a small door, that few centimetres difference is still there. If I had gone for the SANDVIK doors, I’d have had an even timber all the way around, and an easier time putting the spline in the gaps.
These doors were ordered online, without seeing them in the flesh due to being in Stage 4 lockdown in Melbourne. If I had been in store, I may have noticed the difference in the doors, and gone for the SANDVIK. But while I’d have gotten even timber all the way around front and back, I’d also have to deal with the risk of breaking glass which isn’t fun. So this is a minor point, but still one to consider.
What was the hardest part?
Getting the fabric in the groove on the long edges was definitely the hardest – very fiddly and tight to work with. You need to take care to not damage either the frame or the fabric with your screwdriver.
The first edge is fiddly but manageable – the second long edge is the really fiddly one. Thankfully, the two short edges – that I did last – are so easy to do.
If I had used the SANDVIK doors, that have that even timber edge, this difficulty may have been reduced.