Index Fieldtypes in Statamic
This article is over 12 months old, and may be out of date or no longer relevant.
But you're here anyway, so give it a read see if it still applies to you.
Statamic’s Fieldtypes give you incredible flexibility with how you build your Blueprints. If you’re new to Statamic, these are basically the, well, blueprints that define how the data within different objects can get their data modeled. Think of it this (overly simplified way):
your content pages need a title and some text-based content
your “blog” pages need the same as content, but also a publish date and author
your “movie” pages need a title, director, year of release, list of cast, and movie poster image
Each of these has its own Blueprint that defines what fields the user needs to complete. These Blueprints are made up of Statamic’s Fieldtypes, and allow you to really tailor the editing experience for your authors.
And of course it gets better too: you can create your own Fieldtypes for Statamic. Whether they’re standalone in your site only, or as part of an addon, your Fieldtype definitions allow you to build your own UI within a Vue component that your authors can interact with - which can be great for specific data, such as:
pulling data or options from an external API that needs a bit more UX niceties,
complex interactions like some fancy drag-and-drop or app-specific component, or
an extension of a build-in field that requires more additional config options or features or layout changes
Or even something else if you need it.
When your authors open an edit view within Statamic (such as an Entry, Global, User or Form), they will see your Fieldtype within Statamic’s edit interface.
Which is truly awesome for editing. But remember that Statamic also lists data (like the index list of Entries in a Collection, or Users), which means your custom Fieldtype may be listed here too.
If your Fieldtype is basic and straight forward - like a single field that has a single value - you may be able to simply tweak how it is returned with your Fieldtype’s preProcessIndex method:
1public function preProcessIndex($value)2{3 // do some processing on the $value4 // perhaps making it a percent, a decimal, set number format, currency...5 6 return $value;7}The returned value from preProcessIndex is what appears in the index views within Statamic. And for some Fieldtypes, this is all you’ll need.
Note too, this is just for the index views - there is a preProcess function for the non-index views too, allowing you to have different pre-processing depending on its use.
But what if we have a Fieldtype that stores complex data - like an array. Like an AwesomenessScale Fieldtype that collects and stores some structured data that needs to be within its own field.
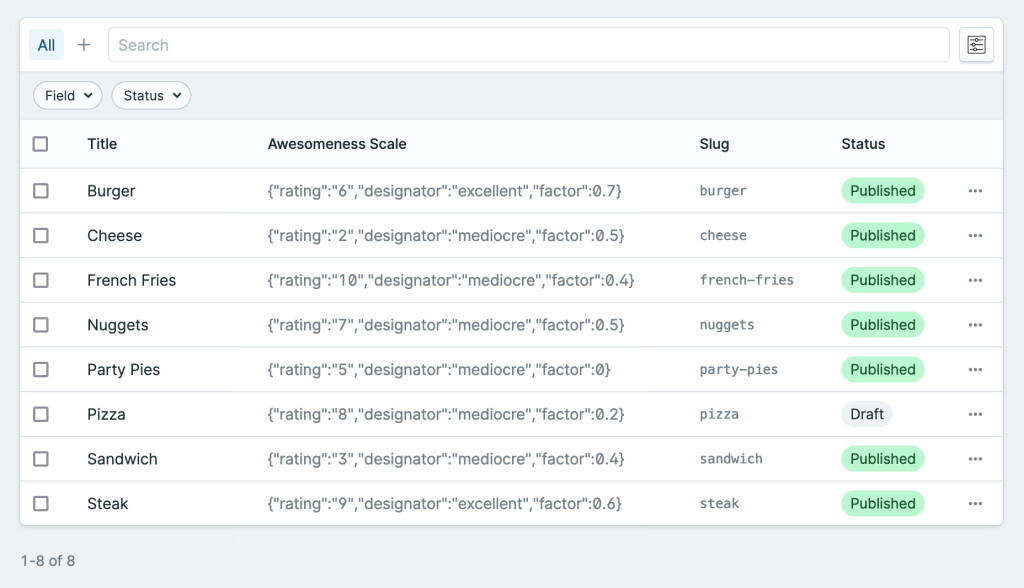
It outputs as, well, an array:

What would your non-technical users think of seeing this in their index listings?
This is where an Index Fieldtype comes in to play.
An Index Fieldtype is an additional Fieldtype definition that dictates how the non-Index Fieldtype’s data gets rendered in Index views - like the listing shown above.
The good news: when you’ve mastered how to create your own Fieldtypes in Statamic, you actually know all you need to also create an Index Fieldtype too. Check out the docs, but the summary is:
create a new Vue component,
follow the naming conventions, and
register it within your site’s (or addon’s) CP JavaScript file
Let’s look back at our AwesomenessScale Fieldtype, and how we register it within our CP JavaScript file.
1import AwesomnessScale from './fieldtypes/AwesomnessScale.vue';2 3Statamic.booting(() => {4 Statamic.$components.register('awesomeness_scale-fieldtype', AwesomnessScale);5});We register our Vue component with Statamic, using the naming convention of a snake-case component name, with the -fieldtype suffix. So awesomeness_scale-fieldtype. Straightforward, right?
Our Index Fieldtype follows a similar naming convention, but we tack on the suffix of -fieldtype-index.
1import AwesomenessScale from './fieldtypes/AwesomenessScale.vue';2import AwesomenessScaleIndex from './fieldtypes/AwesomenessScaleIndex.vue';3 4Statamic.booting(() => {5 Statamic.$components.register('awesomeness_scale-fieldtype', AwesomenessScale);6 Statamic.$components.register('awesomeness_scale-fieldtype-index', AwesomenessScaleIndex);7});We have now registered our Fieldtype and our Index Fieldtype. Too easy.
At this point, let’s assume you’ve created your Fieldtype component already, and you’re all over how that works. The Index Fieldtype uses a different mixin to help you out. At its very basic definition:
1<template> 2 <div> 3 {{ value }} 4 </div> 5</template> 6 7<script> 8export default { 9 mixins: [IndexFieldtype],10}11</script>The IndexFieldtype mixin gives us access to three props for our component:
value, the value stored for your Fieldtype (and returned bypreProcessIndex)handle, the handle of the field in your Blueprint, andvalues, all of the values for the object (based on your Blueprint for that object type)
You have the freedom to use any or all of these props to help define how you want your Index Fieldtype to appear.
For this example, let’s look back at the data we are storing in our AwesomenessScale Fieldtype:
1{2 "rating": 6,3 "designator": "excellent",4 "factor": 0.75}We’ve got a JavaScript object, with three properties that have been set when the author was making changes to the, in this case, Entry. For simplicity, let’s just use the rating.
If we simply output value.rating, we will get 6 displayed in our index.
1<template> 2 <div> 3 {{ value.rating }} 4 </div> 5</template> 6 7<script> 8export default { 9 mixins: [IndexFieldtype],10}11</script>Basic example, but shows how we can access the properties within the value prop.
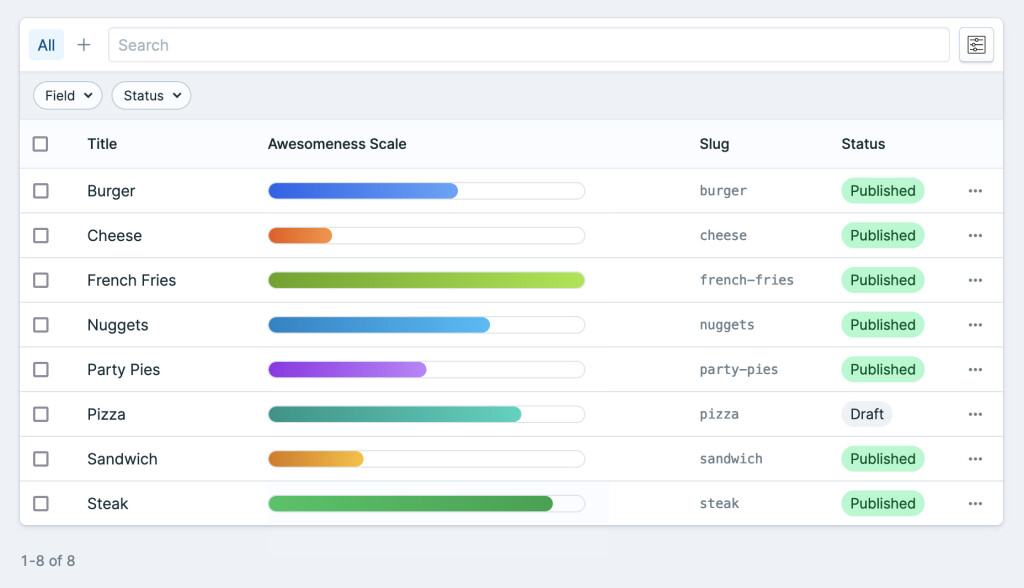
But what if we want to do something fancy - like show a bar helping with scale. We can use the value.rating to help us achieve something a little more visually pleasing:
1<template> 2 <div class="w-full h-4 relative rounded-full border border-gray-400 overflow-hidden"> 3 <div class="absolute inset-0 rounded-full" 4 :class="colour" 5 :style="{ width: width }"></div> 6 </div> 7</template> 8 9<script>10export default {11 mixins: [IndexFieldtype],12 computed: {13 colour() {14 switch (this.value.rating) {15 case 1:16 return 'bg-gradient-to-r from-yellow-600 to-yellow-400';17 case 2:18 return 'bg-gradient-to-r from-orange-600 to-orange-400';19 case 3:20 return 'bg-gradient-to-r from-amber-600 to-amber-400';21 case 4:22 return 'bg-gradient-to-r from-red-600 to-red-400';23 case 5:24 return 'bg-gradient-to-r from-purple-600 to-purple-400';25 case 6:26 return 'bg-gradient-to-r from-blue-600 to-blue-400';27 case 7:28 return 'bg-gradient-to-r from-sky-600 to-sky-400';29 case 8:30 return 'bg-gradient-to-r from-teal-600 to-teal-400';31 case 9:32 return 'bg-gradient-to-r from-green-500 to-green-600';33 case 10:34 return 'bg-gradient-to-r from-lime-600 to-lime-400';35 }36 },37 38 width() {39 return (this.value.rating * 10) + '%'40 }41 }42}43</script>Here we are using the value.rating to determine what colour gradient to use.
And this takes our raw object output and replaces it with something a little neater:

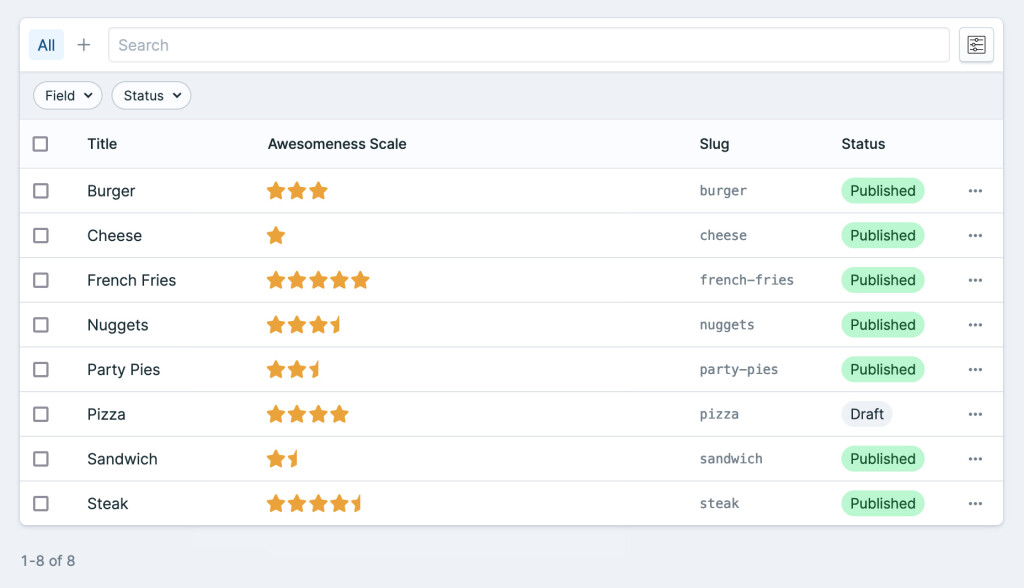
Or could even make it output stars:

What your Index Fieldtype displays is up to you, and the data that is being stored. There’s no one ‘right’ way to do this as it is all about your data, and your users.
And I love that Statamic gives us the flexibility to do it our way… whatever that looks like.
Statamic makes it so easy to define an Index Fieldtype to allow us to customise the way that your Fieldtype’s data can be presented in different ways. Just another way that Statamic keeps offering such a best-in-class authoring (and developer) experience.
Just remember, within your Control Panel Fieldtypes:
your FieldType is about the editing experience
your Index Fieldtype is about the index (view) experience
Now, go forth and make your Fieldtypes be glorious in their Index representation too!